Planning a bathroom renovation is one of the most rewarding home improvement projects you can undertake, but it is also the most technically demanding. Because a bathroom packs electrical, venting, plumbing, waterproofing, and structural loads into a small footprint, a mistake in the planning phase can result in mold, structural rot, or expensive plumbing rework.
To ensure your remodel stands the test of time, you need to balance design guidelines, code compliance, and structural engineering. This guide breaks down the essential rules of bathroom layouts, fixture clearances, water heater selection, and waterproofing materials.
Before diving into layout plans, estimate your starting budget and material requirements with our specialized tools:
1. NKBA Layout and Clearance Rules
The National Kitchen and Bath Association (NKBA) publishes layout planning guidelines designed to optimize safety and ergonomics. While local building codes set the legal minimums, NKBA standards represent the ideal practices for a premium, functional space.
Centerline spacing: Local codes require a minimum of 15 inches from the center of the toilet to any side wall, vanity cabinet, or tub. The NKBA goes further, recommending 18 inches of clearance from the centerline for optimal comfort. This means a toilet alcove must be at least 30 inches wide by code, but 36 inches is highly recommended.
Front clearance: There must be at least 21 inches of clear space in front of the toilet bowl to any opposing wall or fixture. The NKBA recommends 30 inches. If you have a small bathroom, consider choosing a round-front toilet rather than an elongated one to save up to 2 inches of precious floor space.
For a single sink vanity, you need a minimum of 15 inches from the sink center to any side wall (NKBA recommends 20 inches). For double vanities, the distance between the centerlines of the two basins must be at least 30 inches (NKBA recommends 36 inches) to prevent users from bumping elbows.
A bathroom ventilation system must control moisture to prevent mold growth on grout and paint. The International Residential Code (IRC) requires a mechanical exhaust system (fan) if there is no openable window.
The standard rule of thumb for sizing a bathroom fan is 1 CFM (Cubic Feet per Minute) per square foot of floor space for bathrooms under 100 square feet. A minimum of 50 CFM is required. For larger bathrooms, size the fan by adding the CFM requirements of individual high-use fixtures:
- Standard toilet: 50 CFM
- Shower enclosure: 50 CFM
- Standard bathtub: 50 CFM
- Whirlpool or soaking tub: 100 CFM
Always verify that the fan ducts exhaust directly to the exterior of the house through a dedicated wall or roof cap, never venting into an attic, soffit, or crawlspace where trapped moisture will cause wood rot.
2. Tub-to-Shower Conversion: The Drain Dilemma
One of the most popular remodeling trends is replacing an underutilized alcove bathtub with a large walk-in shower. However, this is not a simple swap due to plumbing drain sizing.
International plumbing codes require a 2-inch drain pipe for walk-in showers, whereas standard bathtubs utilize a 1.5-inch drain pipe. Converting a tub to a shower requires updating this drainage infrastructure.
The reason for this code difference is safety. A bathtub serves as its own water reservoir; if water drains slowly, it simply pools in the tub basin. A walk-in shower has a low-profile pan with a threshold height of only 3 to 4 inches (or zero inches in curbless designs). If the shower head flow rate exceeds the drainage rate, water will quickly flood the bathroom floor.
Upsizing a drain line from 1.5 inches to 2 inches requires:
- Cutting back the subfloor to expose the existing P-trap.
- Removing the 1.5-inch P-trap and drain arm back to the main stack or wet vent branch.
- Installing a 2-inch PVC or ABS drain line sloping at a minimum of 1/4-inch per foot.
- Running a new 2-inch P-trap.
This plumbing work adds $800 to $1,500 to a conversion project. However, skipping this step violates code and is a common source of water damage. Learn more about general project pricing in our Bathroom Remodel Cost Guide.
3. Tiling Backerboards: Cement Board vs. Foam Board
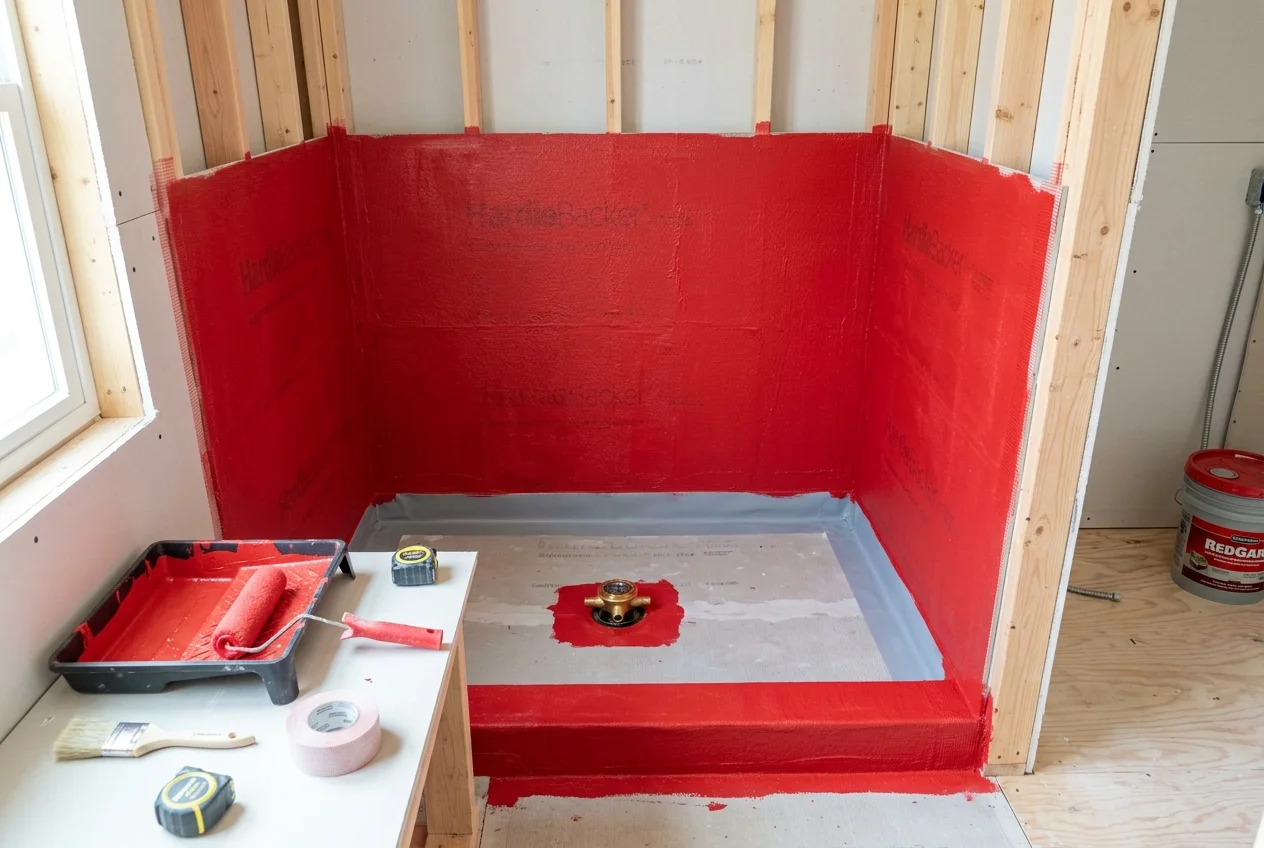
Tile is not waterproof. Water and water vapor migrate through grout joints and tile bodies. To protect your home's wood framing, you must install an approved tile substrate and waterproofing membrane. The two most common options are traditional cement board and modern foam board.
Cement Board is the time-tested standard. It is cheap and structural, but it does not stop water vapor. If you install cement board in a shower, you must either install a 6-mil plastic vapor barrier behind it against the studs, or apply a roll-on liquid waterproofing membrane (like RedGard or Hydro Ban) on the front face before tiling. Calculate your flooring and tile area beforehand using our Flooring Calculator.
Foam Board represents the modern, high-performance approach. Because the panel core is waterproof XPS foam, you do not need a secondary vapor barrier. Once the boards are screwed to the studs, you only need to seal the screw heads and seams with waterproof tape and thinset (e.g., Schluter Kerdi-Band or Wedi Joint Sealant). The speed of installation and lightweight handling offset the higher material costs for most professional tiling contractors.
4. Plumbing Layouts: Pipes, Vents, and Slope
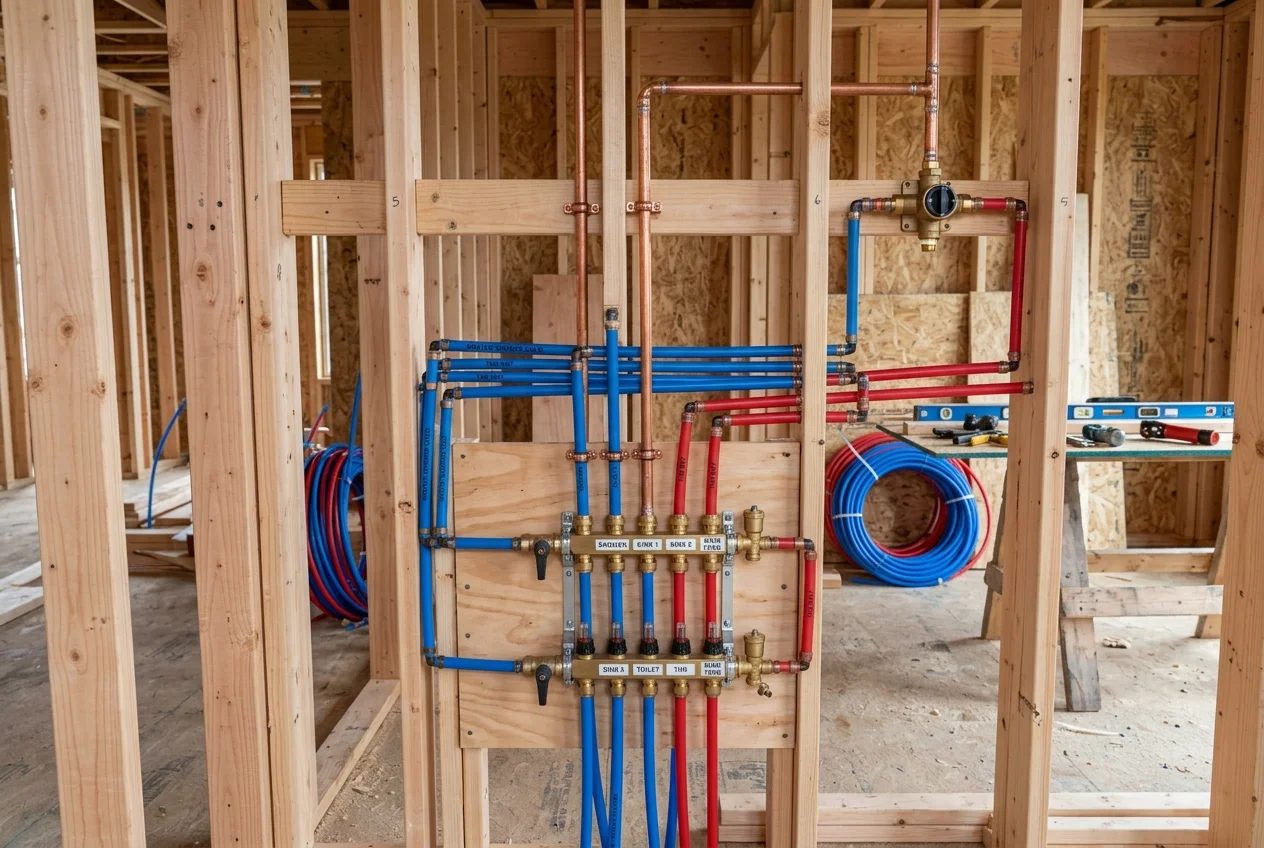
A bathroom's plumbing network consists of water supply lines (delivering pressurized clean water) and the DWV (Drain-Waste-Vent) system.
-
Water supply lines: Modern remodels use PEX (cross-linked polyethylene) rather than copper. PEX is flexible, resists scale buildup, doesn't require soldering, and is less prone to bursting in freezing conditions. Supply lines are typically 1/2-inch for individual fixtures, fed by a 3/4-inch main trunk.
-
Drain line slope: Horizontal drain lines must slope to drain properly under gravity. The universal code standard is a slope of 1/4 inch per foot. If a pipe is sloped too little, water sits and solids clog. If it is sloped too much (greater than 1/2 inch per foot), water flows too quickly and leaves solids behind.
-
Venting: Every drain must have a vent to allow air into the system. Without proper venting, the rush of water down a drain line will create a vacuum that siphons water out of the P-traps, allowing sewer gases to enter the home. Ensure your plumber designs the vent stack system to comply with code distances from the fixture traps.
5. Toilets: Rough-Ins and Flushing Systems
When buying a toilet for your renovation, the most critical measurement is the rough-in distance. This is the distance from the finished wall (not the baseboard) to the center of the floor drain flange.
The industry standard rough-in is 12 inches. If your home is older or has a unique layout, you might have a 10-inch or 14-inch rough-in. Always measure the existing toilet's bolt locations before purchasing a replacement.
Additionally, consider the flushing mechanism:
- Gravity-fed: The most common, relying on the weight of the water in the tank to clear the bowl. Quiet and reliable.
- Pressure-assisted: Uses compressed air inside a sealed inner tank to force water down. Highly effective at preventing clogs, but much louder.
- Dual-flush: Offers two button options for liquid waste (typically 0.8 to 1.1 gallons) or solid waste (1.6 gallons), saving water over time.
6. Hot Water Capacity: Tank vs. Tankless
Upgrading a primary bathroom with double showerheads, body sprays, or a large soaking tub puts a heavy demand on your hot water system. If your current water heater is nearing the end of its service life, a bathroom remodel is the perfect time to replace it. Read about service expectancy in our guide on water heater lifespan.
Compare your water heater options when planning:
-
Tank Water Heaters: Store heated water continuously. Standard household sizes are 40 to 50 gallons. They have lower upfront costs ($1,200 to $2,500 installed) but suffer from standby heat loss and can run out of hot water during back-to-back showers.
-
Tankless Water Heaters: Heat water on demand as it flows through the unit. They offer an endless supply of hot water, take up virtually no floor space, and are highly energy efficient. However, they cost more upfront ($2,500 to $4,500 installed) and require sufficient gas lines or electrical service.
Calculate your hot water demands and tankless flow rates with our Water Heater Calculator.
7. Cost Breakdowns for Bathroom Renovation Tiers
The overall cost of a bathroom renovation depends on the scope of fixture movement and finish choices. Using installer pricing data, we can divide projects into three categories:
Cost data sourced from the Meazora 2026 national pricing indices. Actual local labor rates and custom material choices will influence final contractor bids.
Key Takeaways for Your Renovation
To maximize the return on your bathroom investment:
- Don't move waste lines unless absolutely necessary. Relocating a toilet or shower drain requires cutting joists or concrete slabs, adding thousands to the bill.
- Invest in modern waterproofing. Using foam backerboards and premium membranes prevents hidden water leaks that could ruin your ceiling below.
- Ensure proper venting. Run a 4-inch rigid duct to the outside to exhaust humid air, protecting your new paint and cabinetry from mold.